Friday, August 31, 2012

Star Sampler Quilt Along–Block 5

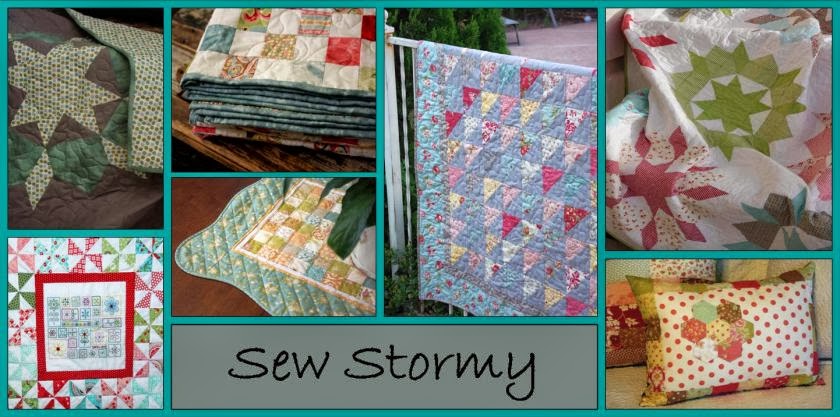
This weeks star is super easy.  The entire block is made of half square triangles.  It’s called the Ribbon Star.  I’ve seen this star with all four corners the same fabric or four different fabrics.  I decided to use two fabrics, because of what I had to choose from.  The blue and yellow are my brightest fabrics and everything else I auditioned faded in comparison.  So, you can decide which version works best with your fabric selection and make that version.  I also added some corner triangles for a little more variety.

Ribbon Star

Cutting and Fabric

ribbon star fabric

Fabric 1 – Background – (8) 4 in. squares

Fabric 2 and 3 – Yellow and Blue – (3) 4 in. squares of each

Fabric 4 – Grey – (2) 4 in. squares

**Cut all squares once diagonally

Step 1 (For some reason I don’t have many pictures of making this block.  Either I forgot or I thought it was easy enough that pictures weren’t needed.  I truly don’t remember what I was thinking. Anyway…  I don’t think many are needed because it is only half square triangles sewn together.  But, just in case you were wondering…..)

ribbon star layout

Lay out your triangles into ribbon star block. 

Step 2

ribbon star step 2

Sew your half square triangles together to make squares.  Press open and trim to 3 1/2 in.

Step 3

ribbon star 3

Sew squares into rows.  Press. Then sew rows together for finished block.  You’re done with block 5! (Told you it was easy.)

Stormy

Monday, August 27, 2012

Summer is over

School started today and I can’t say I’m excited about it.  We had an awesome, super busy summer.  I needed another week or two.  The house is so quiet and I don’t know what to do with myself.  I’m sure I’ll figure it out soon, it just takes time to adjust.  For the last day of summer, my kids wanted to have a big party.  So, they decorated the dining room and made fun lunch…

End of Summer party

We decorated cupcakes…

ate lots of cupcakes…

We played party games…

freeze dance

and did lots of dancing…

Then this morning, everybody got dressed up in their favorite back to school outfits. (Except poor daughter 2, who has to wear a uniform.)

We gave big kisses and hugs, tried to calm the jittery tummies and sent them off to school.

I miss them already.

Stormy

Friday, August 24, 2012

Star Sampler Quilt Along–Block 4

I’m totally loving this next block!  It’s called Morning Star Variation

Star Sampler Quilt Along

Cutting and Fabric

Morning Star Variation fabrics

Fabric 1 – Background – (1) 4 1/2 in. square and (1) 5 1/4 in. square cut twice on the diagonals to make 4 triangles and (4) 2 7/8 in. squares cut once on the diagonal to make 8 triangles

Fabric 2 – Red corner triangles – (2) 4 7/8 in. squares cut once diagonally

Fabric 3 – Blue floral – (2) 5 1/4 in. squares cut twice diagonally to make 8 triangles

Fabric 4 – Dot – (4) 2 1/2” squares and (1) 5 1/4 in. square cut twice diagonally to make 4 triangles

Step 1

Morning Star Variation step 1

Lay out your four triangles you will be using to make your center squares.

Morning Star Variation second step 1

With RST sew Fabric 1 and Fabric 3 triangles together and Fabric 3 and Fabric 4 triangles together. Press.

Step 2

Morning Star Variation step 2

Sew together Step 1 triangles to make a square patch.  Press and Trim to 4 1/2 in.

Morning Star Variation second step 2

Make 3 more of these.

Step 3

Morning Star Variation step 3

Lay out your corner square pieces.

Morning Star Variation second step 3

Line up your background triangle (short side) with your square RST and sew.  (Your 90 degree angle on the triangle should line up even with your square.) Press open.

Step 4

Morning Star Variation step 4

Sew the second triangle on to your square forming one large triangle.  Press open and trim.

Step 5

Morning Star Variation step 5

Sew the two triangles together forming your corner squares.  Press and trim to 4 1/2 in. Make three more of these.

Step 6

Morning Star Variation step 6

Lay out your nine squares.  Sew into rows. Sew rows together to finish your fourth block!!

Stormy

Tuesday, August 21, 2012

Book Tote

My oldest daughter starts her first year of early morning seminary (scripture study class) and high school next week.  She’s pretty excited.  I’m not.  She’s growing up and I can’t stop it.  Sigh.  She’s especially excited because she doesn’t have to wear a uniform to school this year like she did last year.  School shopping has been great fun.  She is going to look adorable very grown up.

She requested I make her a special tote to carry her scriptures in.  I found the cutest pattern for a lunch bag at the Pink Penguin.  It is the perfect size for books / scriptures.  I just changed it up a bit.  I took out the drawstring top and added a pocket for pencils on the inside and another pocket on the outside.  Here is the finished bag.

Scripture Bag

Scripture Bag Inside

I’m pretty happy with how it turned out.  I may have to make a few more.

Stormy

Friday, August 17, 2012

Star Sampler Quilt–Block 3

Maybe its because I have a little boy, but every time I look at the Friendship Star Block, I think of Ninjas.  (He was a ninja for Halloween last year, and I did sew some ninja stars onto his costume.) So I nickname this star “Ninja Star”.  But really, I turned the Friendship Star into a Four-patch Friendship Star.

Star Sampler Quilt Along

Cutting and Fabric

spinning 4 patch fabric

Fabric 1 – Background – (8) 2 7/8 in. squares and (16) 2 1/2 in. squares

Fabric 2 – Stars – (8) 2 7/8 in. squares and (4) 2 1/2 in. squares

Step 1

spinning 4 patch step1

On the back of EIGHT of your 2 7/8 in. background squares, draw a diagonal line.

Step 2

spinning 4 patch step 2

Lay those eight squares Right Sides Together (RST) on top of the eight 2 7/8 in. squares of Fabric 2.  Chain stitch 1/4 in. to the right of your drawn line down all eight of your squares, then turn your chain and sew 1/4 in. down the other side of your line.

Step 3

spinning 4 patch step 3

Cut your squares on half on your drawn line.

Step 4

spinning 4 patch step 4

Press open your half square triangles (seam allowance towards the darker fabric) and trim to 2 1/2 in. squares.

Step 5

spinning 4 patch step 5

Lay out your squares to form the four Friendship Stars.

Step 6

spinning 4 patch step 6

Sew each row into strips.  Press.  Alternate the direction of the seams you are pressing  for each row.  That way when you sew your rows together the seams will “lock” into place resulting in perfect corners.

Friendship Star pressed back

Step 7

spinning 4 patch step 7

Sew your rows together. Pin all your corners making extra sure your seams line up. 

Press open.

Your Ninja Star is finished!  I may have to include this star in my son’s next quilt…

Stormy

Monday, August 13, 2012

My quilting space

I’m always looking for decorating ideas for my sewing room.  It’s the room that comes last.  Every other room has been (mostly) decorated and organized.  And rightly so.  I’m very blessed to have a sewing room and I love it.  But, I would really love shelves instead of totes (which would help with the messy look I’ve got going on).  I would also like it prettied up a bit.  (Maybe for my Christmas present this year?)  Have you ever noticed that a room you thought looked okay looks 10 times worse in a picture?  Anyway, consider these my official BEFORE pictures. 

quilting machine 2

I like to drape my quilts over my quilting machine for awhile so I can decide how I want them quilted. Plus, the quilt tops cover up the clutter of all the totes full of fabric underneath.

sewing table

This is my favorite corner.  I plan on making a chair cover.  Someday…  Did you notice my tables?  They were stolen from my hubby’s camping gear. There is also some kids school spelling tests, cards and a “Marvelous Mother Award” tacked to the wall.  My kiddos love helping me “decorate” my space.

Window Shelf

quilting magazines

sewing totes

This is the most embarrassing picture.  Sigh.  I really need shelves.

sitting corner

Sewing Room Shelf

One day my old chair will be recovered too.  This is where my hubby and kids come to sit and visit while I sew.

Well, now you’ve seen it all.  Where I create.  My favorite room in the house.  I think I need to browse a few more inspirational pictures….

Stormy

Friday, August 10, 2012

Star Sampler Quilt Along Block 2

The second star in our quilt-a-long is my favorite star block.  There are lots of variations and names, but the name I like is ‘Party Hats’. 

Star Sampler Quilt Along

Cutting and Fabric

party hats block pieces

Fabric 1 –  Background  (4) 4 1/2 in. squares and (1) 5 1/4 in. square cut twice diagonally.

Fabric 2 -  Yellow  (2) 4 7/8 in. squares cut once diagonally.

Fabric 3 – Blue  (1) 4 1/2 in. square and (1) 5 1/4 in. square cut twice diagonally.

(Please ignore the triangle fabrics already sewn together. I forgot to take the first picture.)

Step 1

party hats step 1

Sew small background triangle and small blue triangle together. Press open and trim.

Step 2

party hats step 2

Sew larger yellow triangle onto first set of triangles to form a square.  Press open. Trim.

Tip

party hats step 3

When sewing your blocks together ALWAYS be sure to press and trim to the correct size.  (This block is 4 1/2 in.)  That way your seams will match and your finished block will come out square.

Step 3

party hats step 4

Now, lay your block pieces out. Sew together in rows then sew rows into the finished block (making sure to pin the corners).

Your now finished with block 2!

Stormy

Saturday, August 4, 2012

Star Sampler Quilt Along

A quilt-a-long is always so much fun. Plus, I love sampler quilts.  So, I decided to pick 12 of my favorite star blocks and do my own quilt-a-long.  Once I had the idea, I was so excited I couldn’t wait to start planning it.  The fabric I will be using is from the new Riley Blake line “Seaside” and a few additional fat quarters I picked up in Utah while shopping the fabric stores.  I have 20 fat quarters here to choose from, but you can use as few fabrics or as many as you like, depending on how scrappy you want your quilt to look.

Seaside fat quarter stash

Block #1  - 16 Patch Sawtooth -

Star Sampler Quilt Along

Cutting and Fabric

sawtooth star squares

Fabric 1 – Background (cream) cut (4) 3 1/2 in. squares and (4) 3 1/2 x 6 1/2in. rectangles.

Fabric 2 – Star Points (blue dot) cut (8) 3 1/2 in. squares.

Fabric 3 and 4 – Center Squares (multi floral and red geometric) cut (16) total (8 of ea,) 2 in. squares.

Step 1

mark flying geese square

Using a ruler and pencil (or fabric marker), draw a diagonal line on the back of Fabric 2 squares  from corner to corner.

Step 2

sew and trim quarter inch flying geese

Lay your marked square (RST - right sides together) on top of a Fabric 1 rectangle, lining up one side, top and bottom.  Sew along your marked line.  Then, trim off the corner using a 1/4 in. seam allowance.  Press the seam allowance towards the darker fabric.

Step 3

sew and trim second flying geese square

Repeat Step 2 to sew another square to the opposite side of the rectangle.  Press open.

Make (4) flying geese blocks.

Step 4

Center 16 patch

Lay a square of Fabric 3 on Fabric 4 (RST) and sew a 1/4 in. along one side.  Repeat for all 8 sets of blocks creating (8) two patches.  Press all seams to darker fabric.  Then, lay all two patches (RST) and sew to make (4) strips of (4) squares. Sew strips together (pinning at corners) to make the final 16 patch.  Press.

(As I was typing the instructions, I realized I should have taken more pictures showing these steps.  Sorry.)

Step 5

layout sawtooth star blocks

Lay your blocks into three rows and sew each row together.  Then sew rows together making sure to pin the corners.

And you are finished with Block 1.  Yeah!  I hope you are as excited as I am to sew the next block!

Stormy